
The goals for this section include:
Servlets are programs that run on a web server and interact with the user over the Internet. Servlets are written in Java, which means they use a platform-independent protocol to interact with the web servers needed to deploy them. This makes deployment and component-building simpler. It also saves developers from having to learn proprietary languages for specific web platforms, and enables them to create easily customizable servlets that can be adapted for different web applications or deployed into different environments. AppComposer is an excellent tool for creating or customizing servlets and for assembling servlets and other resources into portable, Java-compliant, web applications.
Servlets also free the developer from writing a complete front-end user interface, since users interact with servlets through browsers. Another benefit of Java servlets is that, unlike an applet, a web server executes all of a servlet's code, so the developer does not need to worry about client-side compatibility or security issues. This diagram shows how a servlet web application connects all of its parts.

As you can see outlined in the diagram, the servlet:
For more detailed information about servlets, see:
This exercise explores AppComposer's servlet editing capabilities by building a very simple servlet which displays HTML text. In later lessons, you will build on that servlet so that it can accept input from a user and use the input to personalize the message it outputs.
Start AppComposer.
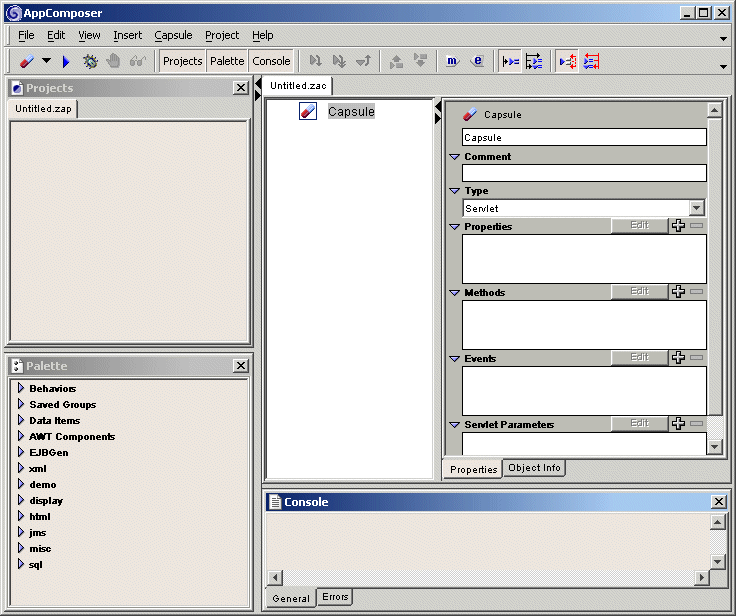
In this tutorial you will learn about AppComposer by building a Java servlet capsule. AppComposer uses the metaphor of capsules to describe the building blocks of applications. Most of the work you do in AppComposer is in the context of a capsule. Capsules are a means of organizing an application into modules. A capsule itself is a component that can be contained in other capsules. AppComposer shows the contents of capsules in a hierarchical outline form. Behind the scenes, AppComposer translates capsules from the graphical interface you see into Java-compliant components.
Capsules use .zac as their file type suffix. To save projects, use the suffix .zap.
File -> New Capsule -> Servlet 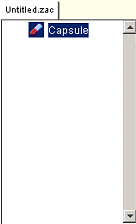
hello.zac anywhere within the AppComposer
directory.
Project -> Add. hello.zac.hello.zac to your untitled project.hello.zap and save it in the same
directory as your capsule.
Now you have an empty servlet capsule named hello.zac. You need
to give it some actors and behaviors so that it can send output to a browser.
When you use a Java component in AppComposer, the instance of that component is called an actor. AppComposer provides many built-in components that you can use as actors in your capsule, and you can import compliant Java components and beans and use them as actors in AppComposer.
You can assign behaviors to an actor. As the name implies, behaviors give the actor the ability to do something. It might print output, respond to an event, evaluate a conditional statement, interact with a resource outside of the servlet, or any other kind of action that it is possible to create using Java.
For this example, you will give the hello.zac capsule some actors
that represent HTML output, and insert a behavior that instructs an actor to
send output to a browser on request. AppComposer includes a library
of components that correspond to HTML tags so it is easy for your servlets to
generate browser-ready output.
HTMLDocument. You can drag it or click it to insert
it into the capsule.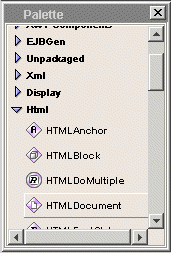
HTMLText actor GreetingText.

Notice how GreetingText is indented in the outline as compared
to HelloDocument. This is because when you have an actor selected
in the outline, and then insert a new actor or behavior, AppComposer
inserts it as a child of the actor or behavior that was selected. Notice
also that HelloDocument now has a down pointing wedge  next to its icon. Wedges show that the actor has a child or behavior associated
with it. When the wedge points down, the outline displays the child actors or
behaviors. If you click on the wedge, it faces right
  ,
and the outline no longer shows the actor's child elements.
So far you have inserted and named some HTML elements, but they are generic, that is, they do not contain any specific properties. AppComposer's HTML actors include properties that correspond to any option you can configure within the matching HTML tags. For instance, an HTML document might contain a title or a background color, and a text element needs some actual content within the text tags. You need to edit these actors so they output more than just generic, empty HTML tags.
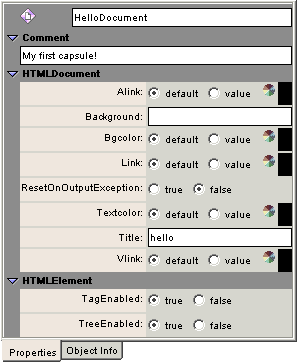
Title field.
GreetingText in the outline.
GreetingText. Text field.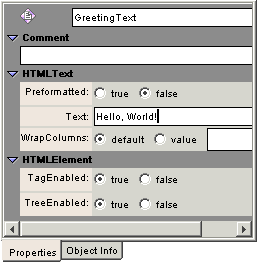
Now your capsule contains some actors that hold content for an HTML document. But so far the servlet has no behaviors to associate with this content. It needs to be able to respond to a browser that requests this document, and to be able to send the content out to the browser. To do this, you need to give HelloDocument a behavior.
AppComposer includes several different kinds of behaviors. You can also create new behaviors, edit existing ones, and combine behaviors together into groups. You can then save, rename and reuse common behaviors or actors as often as you wish. AppComposer calls behaviors and actors that you create and save Saved Groups. AppComposer makes these behaviors available from the Insert -> Saved Group menu on the tool bar, or from the Palette in the Saved Groups menu..
AppComposer provides a predefined saved group that is useful for
this servlet. It instructs its actor to accept GET requests from
a browser, and return output to it. This behavior is called ServletGet.
Insert -> Saved Group -> ServletGet to see what ServletGet contains.
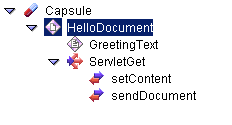
ServletGet is an action group behavior. You can see that by
its icon ![]() and because it has two
behaviors as its children. Like actors, each behavior has an editor so you can
define or modify it. AppComposer also provides tools in the outline
editor so that you can see what triggers behaviors, and what they in turn affect.
These tools give you a better idea of how this action group works.
and because it has two
behaviors as its children. Like actors, each behavior has an editor so you can
define or modify it. AppComposer also provides tools in the outline
editor so that you can see what triggers behaviors, and what they in turn affect.
These tools give you a better idea of how this action group works.
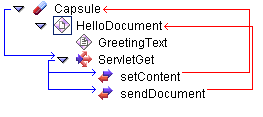
By following the blue arrows, you can see that the servlet capsule activates ServletGet. In turn, ServletGet activates both of its child actions. Look at the details of the child actions to get a better idea of what each does.

Select sendDocument in the outline and look at its details.
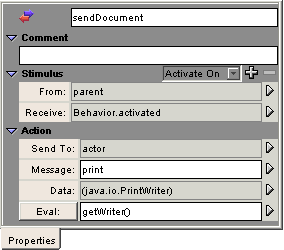
The sendDocument behavior also activates when its parent behavior, ServletGet, activates. Instead of sending a message to the servlet capsule, sendDocument sends a message to its actor. If you look at the capsule outline, you can see that sendDocument belongs to the actor HelloDocument. So this behavior uses Java methods to tell HelloDocument to send its output.
Together, the actions that make up ServletGet respond to a GET
request from a browser by sending the HTML content you created.
You can try this for yourself.
http://localhost/
site.
The result of the servlet capsule you created may seem humble, but you can build upon the ideas you used to create this to make servlets of far greater complexity and utility.
In the next lesson you will add some interaction with a user. Instead of static output like the Hello, world! example, you will modify the servlet capsule so that it asks for the user's name, and uses it to greet them.