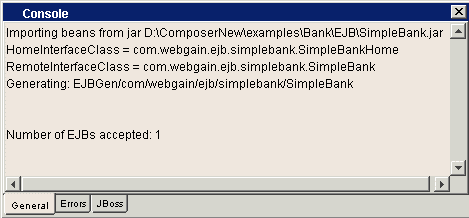
Your window should look like this:

To test servlets in AppComposer, you need a web server.› Since you will use a servlet to call your EJB, make sure that AppComposer's built-in web server is enabled.› For more information on enabling the local web server, see Setting Up Application Composer in the introductory tutorial.
This example uses an EJB, so you also need to enable an EJB server. EJBs use a standard interface to tell the enterprise container, or server, what services it uses. The container actually implements these services. This means that to test or run a servlet capsule that uses an EJB, you need to configure the EJB server, and deploy the EJB to it. AppComposer includes an EJB server called JBoss.

AppComposer is now configured to load the EJB server. A new tab appears on your Console pane that displays output from the JBoss server as it starts up.
You are now ready to make the SimpleBank EJB accessible to AppComposer.› EJBs require an extra import step when working with one for the first time.
Before AppComposer can use an EJB, you need to import it into AppComposer. When you import an EJB, AppComposer creates a JavaBean that acts as a proxy to the EJB. This proxy shields you from having to write code to lookup and cast the bean, and allows you to interact with the bean using AppComposer's capsule interface.
When you import an EJB, AppComposer processes any EJBs in the jar into a format
it can use.›AppComposer does this by creating a JavaBean proxy for each EJB
and copying the resulting jar file (for the JavaBean proxy) to the Composer/beans
folder. Saying Yes in the Deploy dialog puts a copy of the bean into
the Composer/jboss/deploy folder, so that the jBoss container can run
the bean. Since the SimpleBank jar only contains one EJB, only one bean is processed.›
Information regarding the status of the process is output to the Console pane.›
If the processing is successful, you see a message that the bean was found and
successfully read:

In the next lesson you will create a servlet capsule to use the bean, and you will create a form page for a user to enter an account number. Later in the tutorial, you will add processing capabilities to the servlet, using the SimpleBank EJB, to take that account number and return a balance for the account.